

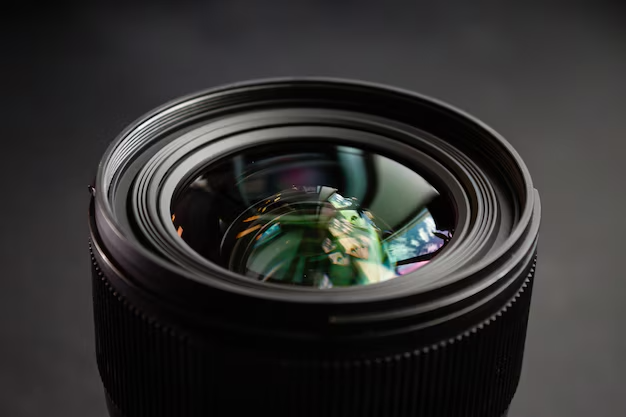
There is a particular kind of excitement that comes with receiving a package in the mail that you know contains your camera.
Not a new camera exactly. The same camera you sent away a couple of weeks ago. But also not the same camera at all. Because what comes back after a full spectrum conversion is a fundamentally different tool from what you sent. It looks identical on the outside. It feels the same in your hands. But what it can see, and what it can do with the light that surrounds us constantly and invisibly, has changed in ways that will affect every creative decision you make with it from this point forward.
If you are considering getting a full spectrum converted camera or if you have recently received one and are trying to understand how to get the most from it, this guide is for you. Not the technical specifications that you can find on any manufacturer website, but the practical reality of what owning and using a full spectrum modified camera actually involves day to day.

Understanding What Your Converted Camera Can Now See
Before getting into the practical details of using your converted camera, it is worth taking a moment to understand what the conversion actually changed and why it matters for how you approach photography with it.
Your stock camera came from the factory with a filter installed directly in front of the sensor. This filter blocked ultraviolet and infrared light from reaching the sensor, restricting its sensitivity to roughly the same range of wavelengths that human eyes can perceive. The result was accurate, natural-looking color rendering in normal photography conditions.
Your full spectrum converted camera has had that filter removed and replaced with optically clear glass. The sensor now receives ultraviolet, visible, and infrared light simultaneously. It is sensitive to a dramatically wider range of electromagnetic radiation than your eyes can perceive. This expanded sensitivity is what makes the converted camera such a versatile and powerful imaging tool across multiple photography disciplines.
The important thing to understand practically is that your full spectrum modified camera does not automatically produce infrared or ultraviolet images. Without additional filters, it produces images that are affected by all wavelengths simultaneously, which typically results in a color cast that is not ideal for most photography purposes. The conversion is the foundation. External filters are what direct that expanded sensitivity toward specific creative and technical goals.
The Filter System That Makes Everything Work
This is the part of full spectrum converted camera ownership that people underestimate before they have one and quickly come to appreciate afterward. The filter system is not an afterthought. It is central to how you use the camera effectively.
For standard daylight photography where you want accurate color rendering similar to a stock camera, you need a UV/IR blocking filter. This filter, attached to the front of your lens or in some cases inserted between the lens and body, restores the sensitivity restriction that the stock filter provided. With a UV/IR blocking filter in place, your full spectrum modified camera produces results that are very close to a stock camera, with accurate color rendering and normal exposure behavior. The difference is that you can remove that filter whenever you choose and access the full range of the sensor’s sensitivity.
For infrared photography, you use an infrared pass filter. These filters come in different specifications that determine which infrared wavelengths are passed. A 590nm filter produces a warm, golden infrared look with some visible light color remaining. A 720nm filter produces the classic infrared look with glowing foliage, dark skies, and dramatic contrast. An 850nm or 950nm filter produces a deep infrared result with very little visible light influence, creating extremely high contrast monochromatic images with a distinctive look that has no equivalent in visible light photography.
For astrophotography, the filter choices open up the full range of narrowband and broadband options. A hydrogen-alpha filter paired with your full spectrum converted camera captures emission nebula detail with dramatically improved efficiency compared to a stock body. A dual narrowband filter passes both hydrogen-alpha and oxygen III simultaneously, producing data that can be processed into the false color images that define a significant portion of contemporary astrophotography. A UV pass filter opens up ultraviolet photography applications that most photographers have never explored.
The Practical Workflow Changes
Using a full spectrum modified camera introduces some workflow changes that are worth understanding before you head out to shoot for the first time.
Autofocus behavior can change depending on which filter you are using. UV/IR blocking filters typically allow autofocus to function normally. Deep infrared filters significantly reduce the light reaching the autofocus system, which can make autofocus unreliable or non-functional. Many infrared photographers using a full spectrum converted camera with deep infrared filters prefer to use manual focus for this reason, or to use live view focusing which bases focus on the actual image data rather than the dedicated autofocus system.
White balance requires attention with infrared filters. The color cast introduced by infrared filtration varies depending on the filter specifications and the shooting conditions. Setting a custom white balance by pointing your converted camera at a neutral subject in infrared light, or shooting in raw format and adjusting white balance in post processing, gives you the control needed to achieve the tonal results you are aiming for.
Exposure times increase significantly with narrower infrared filters. A 590nm filter requires modest exposure compensation compared to visible light photography. A 950nm filter may require exposures several minutes long even in bright sunlight. Understanding the exposure behavior of your specific filter combination in different lighting conditions takes some experimentation, and that experimentation is genuinely enjoyable once you understand what you are working toward.
Astrophotography With Your Converted Camera
For astrophotographers, a full spectrum converted camera is one of the most versatile tools available. The ability to pair the converted body with a wide range of filters for different imaging applications makes it suitable for broadband galaxy and cluster imaging, narrowband emission nebula work, and specialized applications like hydrogen-alpha solar imaging with appropriate safety filtration.
The improvement in hydrogen-alpha sensitivity compared to a stock camera is dramatic and immediately apparent in your data. Emission nebulae that produced thin, unconvincing results with a stock body become rich, detailed targets with a full spectrum modified camera and appropriate filtration. The signal that was always there, being filtered out by the stock camera’s hot mirror, is now being captured and recorded by your sensor.
For deep sky imaging in light polluted environments, the ability to use narrowband filters with a full spectrum converted camera is particularly valuable. Narrowband filters pass only very specific wavelengths of light, blocking the broad spectrum light pollution that degrades images taken under suburban or urban skies. The combination of a full spectrum converted body and narrowband filtration makes serious deep sky astrophotography accessible from locations that would be completely unsuitable for broadband imaging.